If you have a pneumatic air compressor, usage high-pressure air to blow the dust out of crevices or molding information. Clean down the areas to be painted with a tack fabric to get any remaining sanding residue. Use an even coat of primer-sealer to all surface areas to ensure a well-bonded finish coat.

Another advantage to a primer-sealer is that it offers an excellent base for semigloss, water-based paint. High-gloss enamel paint was as soon as the preferred surface for kitchen cabinets due to the fact that it withstands spots and water and is quickly cleaned, but today's water-based surfaces are much easier to work with and provide a similarly durable surface (Cabinet Painting Contractors 28217).
This permits you to work rapidly in the less crucial areas, and enables you to see and fix any drips or smudges on the most noticeable areas - Cabinet Painting Contractors 28209. Next, paint the cabinet doors and drawer fronts, along with any separate wood pieces or moldings. If these parts have actually raised or routed functions, be sure to flow the paint into crevices and corners, however don't enable it to build up in these spots.
Thin coats leave less noticeable brushstrokes and dry quicker. Do not lay the surface on thickly and do not overwork the brush a lot of brush strokes will produce air bubbles in the surface, leaving bumps and pits when it dries - Cabinet Painters 28214. Enable the paint to dry for at least 4 hours in between coats.
2 coats of quality paint are typically adequate, but you may wish to add a 3rd coat because kitchen area cabinets take great deals of penalty from cooking heat and everyday use, and wood surfaces require all the protection they can get.
Things about How To Cabinet Painting 28215 Paint Kitchen Cabinet Painters 28277 Cabinets - what kind of paint to use on cabinets - Bitterroot Diy
Wish to speed up the job? Select a fast-drying guide for the very first coat. Read the label for details on recoating time and to make sure the primer works with the paint you're preparing to use (Cabinet Painting Contractors 28213). Pro Idea: Utilize an enamel underbody primer. Water-based paint has actually come a long way, and some excellent acrylic alkyd hybrids competing oil-based paint.
Oil-based paint dries slowly and levels well. This gives you more working time and fewer brush marks. Likewise, when they're dry, oil-based guides like Benjamin Moore Clean Slate Enamel Underbody sand easily to supply an ideal base for your surface coat. Cabinet Painting Contractors 28214.
3 out of 5 Moderate Though it's just paint, getting the brushwork right requires time and patience. Drill/driver Paint scraper Putty knife Store vacuum with drywall-dust filter Random orbit sander Nylon-Polyester chisel-tip Paint brush - 2 1/2- Inch Safety goggles respirator fitted with organic vapor canisters Chemical-resistant gloves If your kitchen cabinets are strong but dated and dark, a fresh coat of paint can go a long way toward changing the area without draining your savings account - Cabinet Painting 28207.
" You do not need to spray to get a smooth surface," says painting contractor John Dee, who has actually dealt with a variety of This Old House TV jobs. He often brush-paints cabinets anyway due to the fact that it gives him more control and prevents the danger of paint spray winding up where it's not desired.
But the result is a durable, glass-smooth finish that's the equivalent of anything from a spray weapon. "You just require to utilize the best products and make the effort to sand and do the brushwork right," Dee states. Continue reading for our pointers for painting kitchen area cabinets. Before starting a cooking area paint task, empty the cabinets, clear off the counters, and eliminate freestanding devices.
4 Easy Facts About Help! Painting Kitchen Cabinets - They Look Streaky Afterwards ... Shown
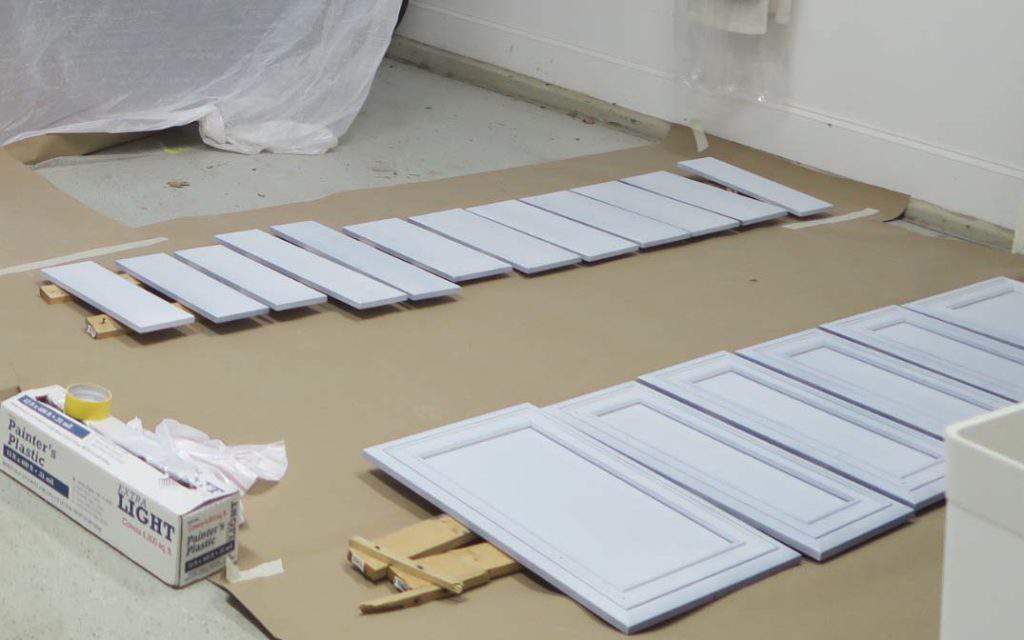
Tape rosin paper over the countertops and flooring, and tape plastic sheeting over the backsplash, windows, fixed appliances, and interior entrances (to secure the rest of the home from dust and fumes). Mask off the wall around the cabinets. Lastly, set up a worktable for painting doors, drawers, and shelves.
" Old cabinets are covered with whatever from hand oils to oily smoke residue to scared gravy," says Dee. "You've got to get all that off or the paint won't stick." Back out the hinge screws from the cabinet frame and get rid of the doors. Working methodically from left to right, top to bottom, label each one with a numbered piece of tape.
Set aside the shelf-hanging hardware. At your worktable, get rid of the pulls and hinges and conserve what's being reused. On the doors, move the number from the tape to the exposed wood under one hinge. Cover it with fresh tape. Open the windows for ventilation and place on security equipment. Scrub down all of the face frames, doors, drawer fronts, and shelving with an abrasive pad dipped in liquid deglosser.